Your skin usually asks for simple things right after you've overdone it. Maybe you used a strong exfoliant, tried a new retinoid, or layered one too many “glow” products in a single night. The result is familiar. Tight cheeks, uneven texture, a little redness, and the sudden urge to put away every bottle with an active ingredient list a paragraph long.
That's where honey and milk for skin still makes sense.
In Korean skincare, the most advanced routines aren't always the busiest ones. Good skin often comes from knowing when to step back and support the barrier with ingredients that feel calm, familiar, and functional. Honey and milk belong in that conversation. They're old-world ingredients, but they fit modern skin concerns surprisingly well when you use them with restraint and clear expectations.
The Timeless Allure of Honey and Milk
You exfoliated a little too hard, your cheeks feel warm, and even your usual moisturizer starts to sting. In that moment, a short, gentle mask often serves skin better than another strong treatment. Honey and milk have stayed in circulation for that reason. They are simple, familiar, and well suited to skin that needs comfort more than correction.
Used well, this pairing fits the logic of modern K-Beauty. The goal is not to chase instant transformation. The goal is to give stressed skin a brief reset, then return to a routine that supports the barrier instead of pushing it harder. That is why this remedy has lasted beyond trend cycles.

Why this pair still works in a modern routine
Honey brings the rich, cushioned feel people usually want after over-cleansing, weather stress, or a week of ambitious actives. Milk changes the texture, making the mixture easier to spread in a thin layer and giving the mask a softer finish on the skin. Together, they create a treatment that feels soothing without asking much from irritated skin.
That matters in a complex routine. A DIY mask should have a narrow job. Calm things down. Add surface comfort. Help skin feel more supple before you move on to the rest of your regimen.
I tell people to judge this remedy by those standards, not by viral claims. It will not replace a serum designed for pigmentation, acne, or chronic sensitivity. It can, however, be a useful short-contact option on nights when your skin looks dull, feels tight, and clearly needs less stimulation.
Practical rule: Use this mask when your skin feels depleted and reactive to stronger products, not when you want fast visible change.
Where tradition meets better judgment
Traditional ingredients deserve respect, but they also need context. “Natural” does not mean low-risk, and “used for generations” does not mean suitable for every face. Honey can be sticky and occlusive on some acne-prone skins. Milk can be a poor choice for people who react easily to dairy proteins or who already have a compromised barrier.
The smart way to use honey and milk for skin is with restraint. Keep the formula simple. Patch test first. Use it occasionally, and stop if you notice itching, heat, or lingering redness.
That approach is very close to the best of Korean skincare practice. Tradition gives the starting point. Experience, formulation knowledge, and respect for skin biology determine whether a home remedy belongs in your routine or whether a professionally formulated calming mask will do the job more safely.
The Science Behind the Soothing Glow
A honey and milk mask feels good for a reason. The two ingredients affect skin in different ways, and the benefit is mostly superficial, which is exactly why this remedy can work well on the right night in a K-Beauty routine.
Honey does the heavier lifting. On skin, it acts as a humectant, so it helps bind water at the surface and reduces that papery, tight feeling that often shows up after over-cleansing, dry weather, or a run of strong actives. Honey also has documented antimicrobial activity, as noted earlier, which is one reason it has stayed relevant in wound care research and in skincare formulas that aim to support stressed skin.
That does not mean every jar of kitchen honey behaves like a lab-tested treatment. Source, processing, and concentration all matter. In practice, the most reliable cosmetic result from honey is simple. Skin feels softer, looks less dull, and has a more cushioned finish for a few hours after use.
What honey contributes
The immediate effect is hydration support and comfort. Honey forms a light film on the skin, which can reduce water loss for a short window and leave the surface looking smoother and more reflective. That temporary glow is part moisture, part texture.
There is also a formula trade-off here. A richer honey layer can feel excellent on dry or dehydrated skin, but the same occlusive feel may be too much for skin that clogs easily, especially in hot weather or on top of a heavy routine.
What milk adds
Milk is less about treatment strength and more about refinement. It loosens honey into a texture that spreads more evenly, rinses more cleanly, and feels less tacky on the face. That alone makes the mask easier to use correctly.
It also contains lactic acid, a naturally occurring alpha hydroxy acid. In a DIY mask, the effect is usually mild because the concentration is low and contact time is short. Still, that small amount can help soften rough surface buildup, which is why skin often feels smoother after rinsing rather than just coated.
Milk can also make the mask feel more comforting on contact. For dry skin, that creamy slip matters. For very reactive skin, though, dairy proteins or a weakened barrier can turn a soothing idea into unnecessary irritation.
| Ingredient | Main role in the mask | Best visible effect |
|---|---|---|
| Honey | Surface hydration and short-term barrier support | Softer, more supple-looking skin |
| Milk | Texture adjustment and mild softening | Smoother feel and less surface roughness |
The pairing works best as a short-contact comfort treatment. Honey supplies the cushioned, hydrated finish. Milk makes the mask easier to spread and adds a light smoothing effect.
What this duo can realistically do
This mask has a specific job. It can give dry, tired, or slightly overworked skin a calmer evening with fewer inputs, and it can slot neatly into a routine when full-strength exfoliants or treatment serums feel like too much.
Its limits are clear. Persistent acne, post-inflammatory pigmentation, rosacea flares, and chronic barrier damage usually need a more targeted approach. That is where I draw the line between a traditional home remedy and a formulated product. If skin needs predictable exfoliation, controlled soothing ingredients, or lower irritation risk, a well-made mask or essence from a reputable skincare line is often the better tool.
Crafting the Classic Honey and Milk Mask
If you're going to try a DIY mask, keep it clean and restrained. The classic version works because it's simple. Once people start adding lemon juice, baking soda, or abrasive powders, the mask stops being soothing and starts becoming a problem.
Start with a small bowl, a spoon, pure honey, and fresh milk. You don't need special equipment. You do need patience, because the best texture is fluid enough to spread but thick enough to stay in place.

The best way to mix it
Use honey as the base and add a small amount of milk at a time. Stir gently until the mixture loosens into a glossy, light cream. If it drips immediately off the spoon, it's too thin. Add a little more honey. If it tugs at the skin and feels gummy, add a touch more milk.
For ingredient choice, think in terms of skin feel:
- Raw honey works well if you want a richer, more cushioned texture.
- Manuka or pasteurized honey can be a reasonable option if you prefer a more polished ingredient choice and want to stay closer to the kinds of honey discussed in clinical literature.
- Whole milk usually feels more comfortable than very lean milk because the texture is less watery and more forgiving on dry skin.
How to apply it without making a mess
Cleanse first. Don't apply this over sunscreen, makeup, or a heavy layer of skincare. The mask should touch clean skin directly.
Then follow this sequence:
- Apply a thin, even layer with clean fingertips or a soft mask brush.
- Avoid the immediate eye area and any open or freshly irritated spots.
- Leave it on for 15 to 20 minutes.
- Rinse with lukewarm water, not hot water.
- Pat dry. Don't scrub the skin with a towel.
That timing matters. Leave it on too briefly and you won't get much comfort from it. Leave it on too long and the honey can become tacky in a way that feels irritating rather than soothing.
If you want a visual guide before trying it, this walkthrough helps show the texture and basic application flow:
What works and what doesn't
A few small choices make the difference between a pleasant mask and an annoying one.
- Do this on slightly damp skin if your face tends to feel tight after cleansing. The mask spreads more easily.
- Use a thin layer, not a thick frosting. More product doesn't improve the outcome.
- Rinse gently by loosening the mask with wet hands first. Don't drag at sticky patches.
Avoid these common mistakes:
- Adding essential oils because they “sound soothing.” They often make reactive skin less happy.
- Using very cold milk straight from the fridge on highly sensitive skin. Cool is fine. Shock-cold isn't necessary.
- Treating it like an overnight mask. This is a wash-off treatment.
Customizing the Mask for Your Skin Type
A honey and milk mask only works well when it matches the condition of your skin that day. Skin type matters, but skin state matters more. Oily skin can still be dehydrated. Dry skin can still be sensitized. A reactive face doesn't need a “boost.” It needs less friction and fewer variables.
Healthline advises patch testing honey and being cautious with facial use on sensitive or severely affected skin. That matters here because honey can irritate some people, and the lactic acid in milk may sting a compromised barrier. This is the part most DIY advice skips, especially for acne-prone, eczema-prone, or rosacea-prone skin.

For oily or acne-prone skin
Many people become overly optimistic. Honey sounds promising, so they assume more is better and use the mask too often. That usually backfires.
Keep the formula lighter and the contact time modest. A thinner mix is easier to rinse cleanly, which matters if you dislike residue. If you already use a salicylic acid cleanser, adapalene, or benzoyl peroxide elsewhere in your routine, keep this mask on a separate evening so your skin doesn't feel crowded.
Good practice for acne-prone skin:
- Patch test first along the jawline or behind the ear.
- Use a very thin layer so the finish doesn't feel occlusive.
- Skip extra acidic add-ins such as citrus or vinegar.
If your acne is inflamed and your barrier already burns with basic moisturizers, DIY isn't the smart place to experiment.
For dry or mature skin
This is usually the skin type that enjoys the mask most. Dry skin tends to respond well to short-contact, comfort-focused treatments that don't strip or over-exfoliate.
Use a slightly richer honey-to-milk texture so the mask feels more enveloping. Rinse before it starts to tighten, then follow immediately with toner, essence, and a cream that seals in water. The mask itself isn't the finish line. Think of it as the prep step that makes the rest of your hydrating routine work better.
For sensitive or reactive skin
This group needs the most caution and the least creativity. Don't add fragrance, essential oils, scrubs, or “brightening” pantry ingredients. Keep it to honey and milk only, and test on a small area before putting it on your full face.
Use this quick decision guide:
| Skin condition | Better approach |
|---|---|
| Comfortable but dry | Try the classic mask |
| Reactive with mild tightness | Patch test, then use a very short application |
| Burning, peeling, or actively flaring | Skip DIY and use a plain barrier-support routine |
The mistake I see most often is treating “natural” as a free pass. Sensitive skin doesn't care whether irritation came from a lab or a kitchen.
Integrating This Mask into Your K-Beauty Routine
You get the best result from this mask on a night when your skin feels tired, a little tight, and less tolerant of strong actives. In a K-Beauty routine, place it after cleansing and before the layers meant to stay on the skin. That keeps the ritual soothing instead of messy, and it prevents richer products from trapping any residue.

The right placement
Use the mask on freshly cleansed skin, ideally after your double cleanse if you wear sunscreen or makeup. Rinse it off completely, then apply your hydrating steps while skin is still slightly damp. That sequence matters. Humectant-heavy layers tend to sit better after a short wash-off mask than before it.
A practical routine looks like this:
- Oil cleanse if needed for sunscreen or makeup removal.
- Water-based cleanse
- Honey and milk mask
- Hydrating toner or essence
- Serum
- Moisturizer
- Sunscreen in the morning
What to pair and what to avoid
Keep this mask for recovery-focused evenings. Skip it on the same night as strong exfoliating acids, peel pads, or a more aggressive retinoid routine. Even a gentle DIY mask adds one more variable, and skin that is already close to its limit usually does better with fewer steps, not more.
After rinsing, stay with calm, functional products. A hydrating toner, a barrier-support serum, and a cream are usually enough.
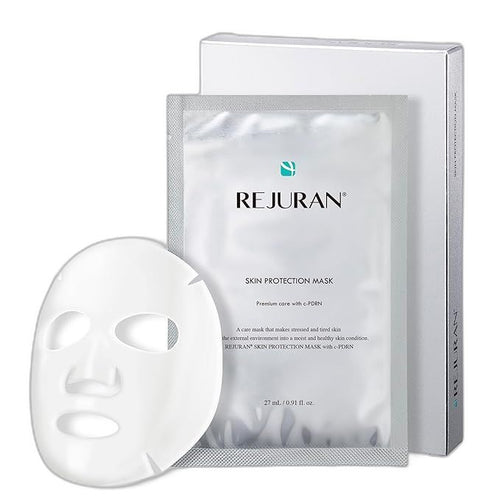
If you prefer the comfort ritual but do not want the inconsistency of a kitchen mixture, a formulated wash-off mask can fill the same slot in your routine. Many K-Beauty products use honey, propolis, rice, or oat to give that soft, replenished finish with better texture control and preservation. Mirai Skin also carries a honey and rice wash-off mask designed for this rinse-off step.
The best night for this mask is often the night you want to reduce stress on your skin, not add more stimulation.
Frequency that makes sense
Once a week is a reasonable starting point. Dry skin may enjoy it regularly, while combination or congestion-prone skin often does better using it only as needed after travel, weather shifts, or an overly active week of skincare.
Watch the next day, not just the first 10 minutes after rinsing. If skin feels comfortable, looks calm, and takes the rest of your routine well, the timing is probably right. If you notice warmth, stinging, new clogged bumps, or lingering redness, stop and switch to a simpler barrier routine or a professionally formulated mask.
The Modern Verdict on a Timeless Remedy
Honey and milk for skin still deserves a place in a thoughtful routine, but not as a cure-all. It works best as a booster treatment. A quiet, low-drama mask you reach for when your skin feels tired, textured, or overexposed to stronger products.
That's the right expectation. Not transformation. Support.
Used carefully, this classic mask can make skin feel softer, calmer, and more comfortable for the rest of your routine. It also teaches a useful skincare habit. Good results often come from matching the treatment to the moment instead of chasing intensity every night.
Professionally formulated products still do the daily heavy lifting. They're more stable, more predictable, and easier to fit into a long-term plan for concerns like hyperpigmentation, chronic dehydration, or visible loss of firmness. DIY has charm, but formulation has consistency.
The smart approach is to use both. Keep the honey and milk mask as a weekly reset or an occasional comfort ritual. Let your cleanser, toner, serum, and cream handle your steady progress.
If you want to build around this ritual with authentic Korean skincare, explore Mirai skin for honey, propolis, rice, and barrier-support products that fit naturally into a modern K-Beauty routine.
If kitchen-counter skincare is your thing, you might also enjoy this complete bone broth method guide — collagen from the inside.